Moving out of a rental property? Let’s be real, getting your full bond back isn’t just nice to have, it’s a must! After all, who wants to lose a chunk of their hard-earned cash over a dusty skirting board or a slightly grubby oven? Spoiler alert – your landlord doesn’t want to keep your bond; they just want the place looking spick-and-span. But exit cleaning Queensland experts can help!
But don’t worry, this isn’t your average dull cleaning checklist. We’re here to make the cleaning process simple, stress-free, and even (dare we say it?) a little fun. With this guide, you’ll ace your exit inspection and maximize your chances of a 100% bond refund. Sound good? Grab your supplies, roll up your sleeves, and read on!
Why Exit Cleaning Matters?
Did you know that 56% of bond disputes in Queensland are due to cleaning? That’s right, most renters lose part (or all) of their bond because the property wasn’t cleaned properly. Getting your bond back starts with understanding the rules.
According to Queensland’s rental laws, tenants are required to leave the property in the same condition it was in at the start of the lease (taking into account “fair wear and tear”). Means? If it was spotless when you moved in, it needs to look spotless when you move out. Queensland exit cleaning services have been made to help you out!
What Happens If You Don’t Clean Thoroughly?
If your landlord or property manager isn’t happy with the state of the property, they’ll use your bond to cover professional cleaning services. These costs often exceed your bond amount, leaving you out of pocket. But a proper clean? That’s a free pass to avoid any heated arguments or unexpected bills. Easy win, right?
The Ultimate Exit Cleaning Checklist
Here it is, the cleaning guide by the best company bond cleaning services Queensland. This checklist covers every nook, cranny, and overlooked corner to make sure nothing costs you your precious bond.
- Start with the Basics
Stock up on supplies! Trust us, you’ll need more than just a sponge and some dish soap. Here’s what you should have on hand:
- Vacuum cleaner
- Mop and bucket
- Cleaning sprays (all-purpose, glass, bathroom)
- Sponges, scrub brushes, and microfiber cloths
- Garbage bags
- Oven cleaner (don’t skip this!)
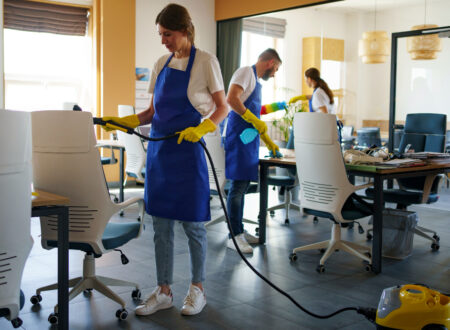
If you don’t have these, you can rent equipment or hire professional cleaners. No shame in calling in the pros if the task feels overwhelming.
- Tackle Each Room Like a Pro
Break the cleaning into manageable sections and attack it room by room. This way, you won’t miss anything!
Kitchen
The kitchen is a landlord’s favorite place to inspect, so don’t skimp on the details:
- Scrub the oven (inside and out—yes, really).
- Clean stovetops, including burners and drip trays.
- Wipe down benchtops, cupboards (inside and outside), and splashbacks.
- Defrost and clean the fridge and freezer.
- Don’t forget the sink and drain! Polish those faucets until they’re shiny.
Bathroom
This is where grime likes to party, so it needs extra TLC:
- Remove soap scum from showers, tiles, and glass screens.
- Clean the toilet bowl, seat, and cistern.
- Wipe down mirrors and bathroom cabinets.
- Scrub sinks and shine the tapware.
- Check for mold—no tenant wants to lose their bond over hidden mold in the shower corners!
Bedrooms and Living Areas
These might seem straightforward, but don’t ignore the nitty-gritty details:
- Dust ceiling fans and light fittings.
- Wipe windows, sills, and tracks.
- Remove any scuffs or marks from walls (magic erasers are lifesavers).
- Vacuum and mop floors—check carpets for stains.
Outdoor Areas
If your property includes a balcony, patio, or backyard, give it some love too:
- Sweep and clean outdoor areas.
- Remove cobwebs.
- Empty and wash out bins.
- Don’t Forget the Small Stuff
Property managers know all the sneaky spots that tenants sometimes forget:
- Clean air conditioning filters.
- Wipe down skirting boards and door frames.
- Dust blinds and clean windows.
- Remove any nails, screws, or hooks from walls and patch up holes.
- Fix Wear and Tear (Where Possible)
While “fair wear and tear” is acceptable, any damage beyond that can eat into your bond. Check for:
- Holes in walls
- Broken blinds
- Scratches on hardwood flooring
Put in minor fixes if you can. A bit of elbow grease now saves you big bucks later!
- The Final Sweep
Once everything is cleaned, do a final walk-through with the Entry Condition Report from when you moved in. Compare the current state of the property against what’s documented. Take photos for evidence, just in case the landlord disputes anything later.
Pro Tips to Nail Your Bond Refund
Not a fan of cleaning? We hear you. Here are some shortcuts to make the process smoother:
- Start Early: Don’t leave cleaning for moving day—it’s chaos. Start a week before.
- Enlist Help: Grab your housemates or even hire professional cleaners if needed.
- Use a Checklist: Download our printable checklist to stay organized.
Beyond Cleaning: What Else Might Affect Your Bond?
Cleaning isn’t the only thing that might put your bond refund at risk. Here are some extra steps to keep in mind:
- Return all keys (and security remotes, if applicable).
- Ensure the garden/lawn is cared for (if it’s part of your contract).
- Pay any outstanding rent or utility bills.
Maximize Your Bond Refund Today!
And there you have it, a clear, do-able plan to guarantee every cent of your bond comes back to you. Cleaning might not be the most glamorous part of moving, but the payoff? Totally worth it!
If the idea of doing all this feels daunting, why not hire professional exit cleaning Queensland? They know the ins and outs of exit inspections and can save you time and stress. That said, confident DIY renters can tackle the job themselves by following this checklist to a tee.
Got questions about cleaning or moving out? Share this guide with a friend who is planning to move. Here is to more bonds refunded and fewer cleaning headaches. Happy renting!




1 Comment